Thursday, May 21, 2020

The secret bread of Morten Bak

" Listen for the smack!'


I had the good fortune to work night shifts with the über Breadman, Morten Bak whose bread is famous even with people who actually never tasted his bread but only heard of it. 
The Breadman ( as I call him in my mind) was so kind to allow me to follow the entire process of his bread making one night, (probably because he was sick of me asking about his recipe every time I saw him!) and he gave me his permission to publish his recipe - so here is the result: a somewhat crazy against all logic recipe for a bread that tastes, feels and smells like something out of this world:

About 800 ml liter of cold water
About 1 kg of white strong flour
About 10 grams of yeast
Lots of salt ( I seem to recall him putting like 3-4 tea spoons in!) 
And a lot of beating, nothing else- beating and lots of time to rise.

As I observed there are five parameters that are essential : 
1. The dough must be wet (approximately 40 % liquid), a lot wetter than I am used to- almost like a thick porridge.
2. The beating! This dough needs to be worked through beyond what you might imagine. When you think enough is enough, you have to push a bit more, and a bit more- as The Breadman says: 'Wait for the smack!' And he is right, when the dough against all odds ( because it's such a wet dough) forms a ball that starts slapping around in the mixing bowl with a smacking sound- it's ready! You need a good strong machine or it won't work - and even so you might have to hold the machine down ( the Breadmans machine has been on the floor quite a few times) I have to admit my Kenwood is really not up to it and I am considering buying an other machine as the mixing time is almost a bit more than half an hour- and The Breadman's mixing only took about two times 6 min.
3. The proving/ testing time: at least 6-7 hours- in a cold place. 
4. The very high temperature when you bake it. 
5. DO NOT PUNCTURE the dough when cutting it into loafs and placing them on the baking tray! If you do, you don't get the holes in the bread!

Morten started by mixing the water ( cold water) with the yeast and salt ( which in my book makes no mind as the salt kills the yeast- we all know this, but as I said, this recipe is against all logic)- he turned the machine on vigorously for 6 minutes- and then added the flour - and he adjusted the amount of water: the dough has to be wet- so wet it's almost a thick porridge. He then worked it at high speed- and told me:' Listen for the smacking sound- wait for it, wait, wait- there! Did you hear it?' And I did. And when I make this bread I use my eyes to watch the dough - and every time I am inclined to stop, because it LOOKS ready- but I hear the voice of Morten in the back of my mind:'Wait for it' -' and I wait- and every time it's true, it's audible- you can actually hear when it's ready. ( and yes, I have tried stopping it when my eyes and sense of logic tells me it's ready- and the result does show in the finished bread, it's not as elastic and springy. I have a notion of him saying about 6 minutes. As I said earlier with my Kenwood Major it takes more than half an hour- and I have to hold the machine from falling to the floor. 

Let the dough rest in a cold place covered with a cloth over night like the Breadman does- he starts off the dough when he gets in at work and bakes it in the morning, so the whole place smells like bread heaven. As he said, he's seen people cover it with plastic wrap but he always uses a cloth. (And I have an idea this might be part of the magic- as the dough gets air to work with.) 

When the dough is ready its grown a lot, maybe out of the bowl, and it will be really bubbly and almost alive. I swear I saw it move!

Now comes another crucial  technique: shaping the breads. I have tried not following it, it tastes good but the texture won't be as good. You want this bread to be light and full of holes. If you puncture the holes, it won't work and the bread will be heavier. 
So dust your clean kitchen counter top with a lot of flour ( so the dough won't stick) and pour the dough out on to it, carefully. Where in the process of making the dough you beat the crap out of the dough, now it's time for some tender loving care! 
Use two dough spatula ( I really don't know the word for it) to CAREFULLY cut out small breads and place them CAREFULLY on a dusted baking tray, and use the spatulas to sort of fold the sides in, under the bread as to tighten them. Do not make the breads too big and do not worry if they don't look perfect, they are supposed to be rustic and uneven looking, it's all part of the charm. 
Bake the breads at 250 degrees- for approximately 25 minutes or until done. My oven burns them if I bake them for 25 minutes- so adjust as you think. The breads are done when they are done in the bottom. I lightly tap them and if they sounds finished they are. Of cause Morten Bak just looks at them and know when they are finished, but hell- he worked on this bread for 6 years! 
You'll know you got them right if the breads are golden brown with light crisp crunchy bubbly thin crust, the inside should have holes in, be a bit chewy and springy ( the test is: when you push down in a with a finger, the dough should bounce back up) but still very light- and they should taste like magic- bread so good it almost feels like a crime to put me ore than just some fresh butter on it. 
This bread stays moist, fresh and delicious for a day or two even- but if you bake more than you can eat in a day, freeze some- and then just pop them in and the oven when you wants a loaf of delicious bread. I tried roasting a slice ( or ten) on the second or third day after, it's simply fantastic!

Pastel de Nata 2.nd attempt


This is my second attempt at making the little fantastic Portuguese cake Pastel de Nata. I took a class at a bakery in Lisbon: https://pastelariabatalha.com/ last summer, it was crazy- 35 degrees outside and even more downstairs in the basement where the ovens were hotter than hell but it was worth it all, the baker João was really friendly and very helpful. 


Crazy for Crumpets

So my youngest went to UK with his best friend and the best friends father who origins from Hastings. When he came home he brought me two packets of crumpets from Warburtons. As soon as I had eaten the first crumpet of the first packet, I ordered a set of crumpet rings from Amazon!

I have been experimenting ever since but still haven’t gotten the holes quite right, even though they tasted really nice even so.


Thursday, July 28, 2016

Obsessing over at Pastel da Nata!!

So i love this little Portuguese cake, actually I spend days and weeks and years even seeing everything there is on the internet, videos, bloggers, vloggers and every damn cookbook I could find to get the right recipe. something is wrong with it, the pastry! When you eat the real deal in Belem or Aloma and hell even in every coffe shop all over Portugal! You noticed the pastry- it's NOT puff pastry som all recipe call for- it's more flaky, but in a crunchy way, hard crunchy flaky way. It's not FILO, it's too dry to work with- so what is it then?. Help me out here, if anyone sees this
Anyways, here is my first attempt!


Thursday, May 29, 2014

The Fabulous Snickers Cake


This sounds silly but this cake really tastes like a Snicker bar! 

I actually stole this recipe from somebody's blog, but she also lent the recipe from somebody else's blog, without noting where, so... Thank you to the original maker of this cake;)
This cake is made in three easy steps: baking the cake, making the chocolate syrup and last covering it with milk chocolate. Easy but takes some time as it has to cool.


The cake itself: 

4 dl.sugar
200 gr softened butter
3 eggs
4 dl flour
1 1/2 teaspoon baking powder
300 gr. salted peanuts

Whisk the soft butter with the sugar, when big and fluffy add one egg at the time and whisk a LOT in between the next egg. Mix the flour and baking powder and gently turn it in the egg mix. Careful you don't loose all the airiness.
Now bake the cake at 190 degrees until done, about 20-30 minutes.


While the cake bakes make the sirope/ caramel:
 boil these ingredients for about 8 minutes:

1 dl.light sirope
1 dl. Fulfat cream
50 gr. sugar
2 teaspoons of vanilla sugar
2 tablespoons of coco powder 


When the cake is baked, let it cool a bit and the pour the caramel over it. Let it soak and when the caramel is completely absorbed and  cooled cover it with milk chocolate.


Eat with delight when cooled- kids and men with a sweettooth loves this cake!


Monday, March 28, 2011

Pies on my mind!


( Pies with meat and onions- a bit of Branston Pickle, and a hint of Heniz ketchup and a touch of Tabasco. The crust is readymade shortcrust. The pies took 10 min to make! A really fast super snack!)

 I have been looking, wishing me, asking for, dreaming of a piemaker for years and years after having borrowed Glyn's fantastic Magic Piemaker from Breville which magically made 2 wonderful pies at the same time at least a dusin times and sometimes for half a year at the time. At some point they stopped making it but I read somewhere that after a lot of protests they starting making piemaking machines again- if' this is true or not I dont know- but when they finally started making it. with 2-4 or 8 slots (!) I couldn't find a place that would send it to Denmark- but finally with the help from Brodock who found it for me on Amazone :my Gourmet Piemaker from Breville wich makes 4 pies at the same time!


Sunday, March 13, 2011

A glimse of baklava


I have to say this...I Loooove baklava!

I have been told that there are is a big difference from the Tyrkish and the arabian baklava- the Tyrkish is soaked in syrope water and can be rather wet and sticky- where as the arabian ones are more crunchy and has less syrope. I have made this in my version of the arabian version ( as I love crunchy things) brushed each layer of filo with cleared butter,  filled the middle  with grinded almonds, walnuts and pine, sprinkled them with sugar and cinnemon, placed the rest of the layers of filo on top, brushed with cleared butter..and then cut the whole thing up in little squares/ retangulars and baked it till crispy and golden.
The syrope I cooked from sugar, water, honey, a bit of rose water...when it was thick and the cake wasnt all cooled down yet, I poured some over the cake..especially in the gaps. Sprinkled it with some chopped up fantastic pistachios nuts from Aegina Island ( dry roasted sundried handpicked pistachios Mrs C brought us)


The birthday cake!

She doesnt have it from strangers..my daughters father is very good with cakes and decorated this birthday cake for our daughter's 12 year old birthday- the roses he formed himself from marcipan...


Regitzes Flowerpot Icecream dessert

My daugther turned 12 this week and made these desserts for her brothers and cousin. We had found the recipy on the internet ( will post the link at the bottum of this ) and she did it all by herself: shopped, planned, did it- and wow, these were really amazing!!


Unfortunately I didnt get pics from the beginning but here is what she did:

She bought some real flowerpots, straws, icrecream, cake ( sandkage) and a lot of Oreos and finally some flowers. 

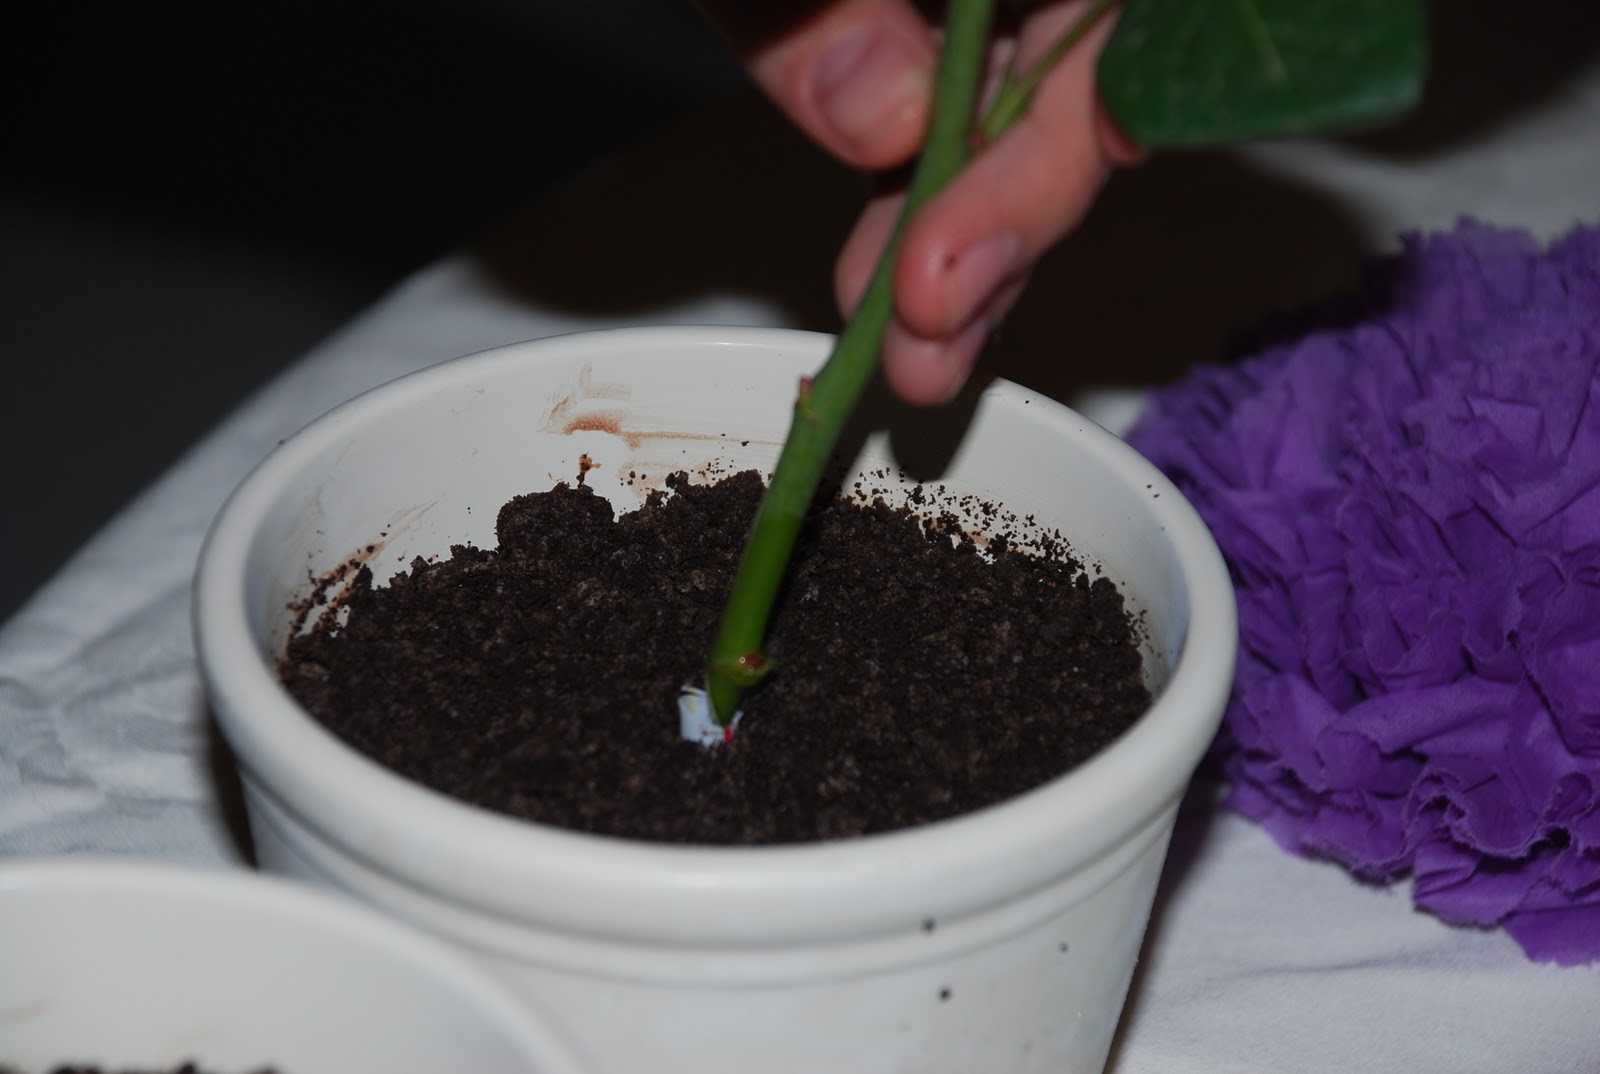
She covered the bottum of the washed flowerpots with the cake, stuck the straw in the middle, held it into posistion while she scooped icecream on top of the cake bottum- with the straw in the middle. She pressed the icream real tight down ( still making sure the straw was in position)  and filled it to about 2/3 of the height and covered the pots with film and placed them all in the freezer til the next day.

Before serving she then drizzeled the Oreo crumbs she had made ( by putting tons of them in a plastic bag and punched on them with my rolling pin till they were all crumbled and resembeled earth/dirt like you wouldn't believe it!) all over the icecream and packed it real tight but still loose on the top layer- cut the straw down to lvl it..put a flower in the straw..cleaned the pots so they looked clean and neat---and served the pot with flower and all to her guests- with a spoon ofc!


The link for the recipy where we stole this from with many thanks: http://foodwishes.blogspot.com/2009/05/potted-plant-ice-cream-cake-giving-mom.html

Thursday, January 13, 2011

Louises carrotcake

This fantastic carrot cake I got from my friend Louise many many years ago and after having served it collegues who really praised it, I will bring her recipy here.

Sorry there isnt a picture, but didn't get to take one before it was all eaten up!

You'll need:

200 gr. of butter
3 1/2 dl. brown sugar
3 eggs
3 1/3 dl. plain flour
2 teaspoons of cinemon
2 teaspoons of baking powder
5 finely grated carrot
75 gr. of walnuts
1 1/2 dl. of raisins/ sultanas

How to make it:

Whisp butter, sugar and eggs together till soft and fluffy. Shift the flour, baking powder and cinnemon well together and mix it in with the egg/butter mix along with the grated carrots, raisins and walnuts. Pour the mix into a buttered and floured baking round baking mould and bake the cake in the middle of the oven at 175 degrees for about 45 or until done.

Sometimes I frost it with an icing made from soft butter, cream cheese, vanilla, icing sugar and lemon juice- which i wisp until very airy- and sometimes i just dust it over with some icing sugar.

Tuesday, November 16, 2010

Flæskesvær!

It's all about the crunch !!

This Danish snack called "Flæskesvær" is made from pigs skin and is a Danish tradition- it's crunchy, tasty and really fattening! But it's almost Christmas time, so let's knock ourselves out with a handful of handmade Flæskesvær!


 How to make them?

Cut pigs skin in thin slices and boil them in water with added salt, bayleaves and chilli. Boil them for about 20-25 minuttes, drain them and pat them dry with a dishtowel and put them in a baking tray with salt sprinkled over then, put the tray  in the oven at 180-200 degrees for about 20-30 minuttes. Drain excess fat from time to time. Make sure the Flæskesvær arent baked too little ( or they'll go chewy and not crunchy- and not tool long or they'll have a burned taste and a too dry texture.


Monday, July 19, 2010

Emok*s Yorkshire puddings!

..an attempt to copy my favorite chef's recipy of Yorkshire puddings...they dont look like his at all, but they tasted great!!


Sunday, July 18, 2010

Thai Lotus cakes- Khanom Dok Bua


..you either love them or hate them!

This cake is  a cake but with a snackie feel to it- as a Thai woman once told me when I asked her about the cakes : "Mm..this is a very old cake! It's good to eat when watching tv! Break it into little pieces and munch on it!"

(I still wonder what the "old" about it was- presumably she meant it was an old recipe!)

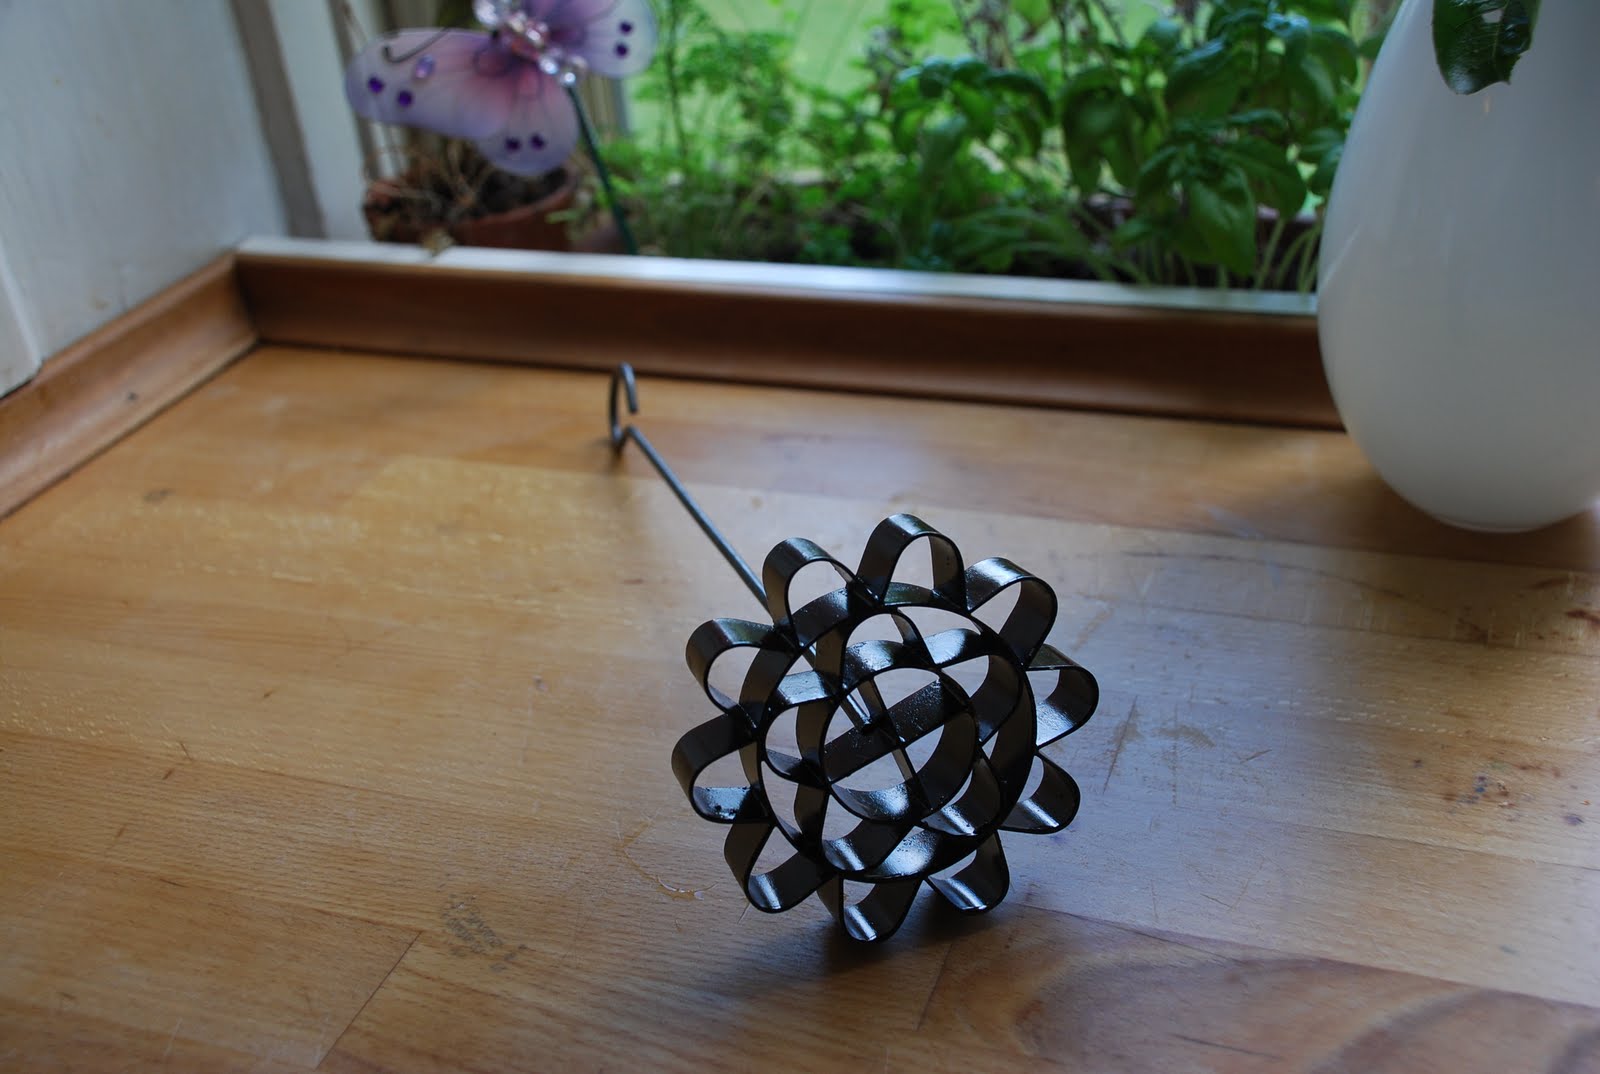
Anyways this cake is a bit of an obsession with me. I saw the first ones in a small shop/ restaurant kind of place very far out in a small place called Stenløse- and I bought a bag of them with me home and was completely blown away- with the presentation and with the taste and the crunchiness and texture! I since was so lucky to get my hands on the iron to make it and have been experimenting to get them just right ever since!


Recipe:

Equal amount of Coconut milk and water
1 kg rice flour with a tiny bit of normal flour in it ( makes them harder and crunchier)
500 or more palmsugar or light brown suger ( gives a better taste)
1 egg
salt
Sesame seeds

 Mix it well and leave it for some hours or even better till the next day. The consistensy has to be like when you dip a spoon in it and lift it up, the batter drips off very slowly and mostly stick on the spoon.

Cooking the cakes:

Heat oil up in a large thick buttomed pot or a large vok- heat the iron up too- and this is the essential in the baking of the cakes- the iron has to be warm enough or the cake wont come off but will stick to the iron.

When its warm enough- sprinkle sesame seeds on the batter for every cake ( or they will sink to the bottum) and dip the iron in the batter- quickly and making sure you don't dip the top of the iron ( or the cake can't come off) and place it in the hot oil, and just as the cake "stiffens" shake it off and turn it upside down. Take the cake out of the oil before it turns too dark and place it in a glass or bowl lined with tissue to absorb the excess oil and press them down a bit, to make the rounded shape. Leave them to cool- and store them in an airtight comtainer- but not till completely cooled off.


Ps. Please- if anyone out there knows this cake, the real name of it and another recipe- please let me know!!

Wednesday, May 12, 2010

Does frying pans dream of electric pancakemachines?


I usually makes small springrolls, but this guy at work, Long made the most fantastic huge springrolls, with his own springroll wrappers and home made chili sauce, so I started experimenting to make them like his. I never succeeded even after quite a few attempts, so Long is still the Springroll Master, but mine didnt turn out that bad even so;)

First I prepared the filling with minced meat and other stuff ( Long says meat and cabbage and stuff..I think I was rebellious and used meat and bamboo and onions) and salt and peber and left it to cool.

Springroll wrappers:
Mix eggs, salt and peber, water, flour ( 1 eggs to 300 gr of flour approx) into a nice smooth, not too thick not too thin...and leave it for a while. Bake the pancakes on a pan - on only one side! I brushed the pan with a tiny bit of oil when needed and poured the batter on and baked them on one side till they look like they were just baked, not browned yet. The I peeled it off the pan and proceeded to the next one. I left them to cool completely off before rolling them.


I deepfried the ones we wanted to eat and put the rest in the freezer. Very easy to take them out, thraw them and deepfry them if we feel like some warm crispy springrolls!

AND now we're at it...I want this springroll  machine for my birthday! That has to be better than sex!!


or this one


then check out this dream of a machine !!

Friday, April 2, 2010

The day Lukas came by

Sweet lille Lukas and his mother came by one Sunday afternoon, so my daugther and I baked some cookies and cakes: Kokos Makroner, Chokolade Snacks, Sukkerkringler and the delicious Gitzes Mini Muffins.


Gitzes Mini Muffins!


My daugther Regitze is very interested in cooking and baking and has been engaged in cooking like folding springrolls and making soups and cakes since she was 7-8 years old. Today she is 11 and these are her fantastic Mini Muffins:
Recipe:
3 eggs
2 dl sugar, prefereble ecological sugar cane sugar ( we dont use the white refined sugar- not much taste or soul to it!)
2 dl. flour ( again here she used ecological flour)
1 1/4 dl sunflour oil ( we use oil instead of butter as its less unhealthy than butter;)
1/2 teaspoon salt
1/2 teaspoon baking soda
1 teaspoon of vanilla sugar ( if you dont have the right stuff)
Rind of 2 lemons ( make sure they are ecological, so you dont eat all the fertiliser poison stuff they spray with)
1/2 dl juice of a lemon

Icing sugar for sprinkling on top when they are done

Mix everything together, dont whisk it but stir it loosely. Regitze started with adding the eggs, then sugar, the flour, salt, baking soda, vanilla, oil and then the lemon stuff. Pour it into small mini muffin moulds, in a mini mufifn paper cup and bake them till just firm and slightly brownish in a 180 degrees oven.

Serve them sprinkled with a bit of sifted icing sugar or make a lemon icing for them. They are delicious!

Kokosmakroner:


These coconut macroons made with egg whites, sugar, grated coconut and marcipan and coated with dark chokolate are really nice when eated on the same day as they are baked. They are surposed to be crispy on the outside and soft and moist on the inside- so dont bake them too much! I found this recipy in my daugthers cookbook and its actually quite nice;)

Recipe:

2 eggwhites ( use the pastorised to make sure you avoid samonella)
100 gr sugar
100 gr grated coconut
25 gr pure macipan
100 gr dark rich chokolate

Mix eggwhites and sugar well together in a  bowl, grate the marcipan and add it. Leave for at least 30 min.
Make 16 spoonfull of the mix on a baking tray ( use baking paper or it will stick), press them into shape with your hands and bake them at 175 degrees for about 15 or until slightly lightbrown.

Cool them off and when cooled dip the bottom of the macroons in melted dark chokolate of a good quality. Leave to cool and serve when completely cooled off.

Keep them in an airtight container if you have any leftovers.)


Chololate Snacks:


These chokolate snacks are very fast to make and extremely easily done- you can make it anyway you want it so there is no real recipy, but here is what I did on that day:

Wanna be recipe:

Dark chokolate ( rich dark and with a large % of chokolate beans)
Corn Flakes

Melt the chokolate- I have to admit I just throw the chokolate into a big thick bottomed pan and smelt it slowly, stirring all the time. When its all melted and cooled off for a minute or two ( it shouldnt be too hot as it will soften the cornflakes  or too cold as then it will stiffen when the cornflakes gets in) stir the cornflakes carefully ( dont break them) and pour the mix into little paper cups. Cool off and eat!

Keep them in an airtight container after cooled off completely.

You can use milk chokolates as well or mix the two that makes it very nice- not too sweet ( as I tend to find milk chokolate) and not too bitter ( as my kids tends to find the dark chokolates, which are my favorite). You can stir in roasted nuts ( unsalted ofc), coconut, candies fruits with the mix as well.

Sukkerkingler:


This in an very old Danish recipe for Sukkerkringler which I found in a book from 1922. In Jutland where I once lived ( its a part of Denmark) they have coffee breaks at all times of the day, all with the name of the time of day : "Formiddags kaffe" ( before noon coffee) "Eftermiddags kaffe" (afternoon coffee) "Aften kaffe" ( evening coffe) and always served with homebaked  "Småkager". Its a very nice ( and fattening tradition) and while living there I tasted these Sukkerkingler which the old grandmother made to perfection and never forgot them. I have looked for a good recipe ever since, and this one are ok, even though not as nice as the old grandmother of the Kjeldsen family. Her Sukkerkingler were very thin and extremely crisy and I dont think anyone else in Denmark can make them as she did.

"Småkager"  are a variation of Danish cookies ( there are so many!) which are little cakes basicly baked with butter, sugar and flour. Today most pleople buy them, but before ( and in my mind mostly in Jutland;)  everyone made them- big batches so they'd last for some time and for all the various coffee breaks.

Recipe ( taken from the old book from Carla Meyer):

500 gr flour
1/3 teaspoon of hjortetaksalt ( which is a baking agent used only for biscuits and cookies)
250 butter
1 1/2 dl of fresh fullfat cream

Sugar to roll the kringler in

Pour the flour into a large bowl, cut the butter into pieces and mix it with the flour and cream loosely till a dough. Leave it for a few hours, then devide the dough into a lot of pieces and roll each and form into a pretzel form and press them into the bowl/plate of sugar so the sugar sticks onto the cookies.

Note: its important to mix the dough loosely so it will become crumbly and crispy when baked.

Place the kringler/pretzels on a baking tray and bake in the oven untill sligthly browned. The recipy is as random as me as it says: "on modarate heat untill the end where you turn the heat up until the sugar starts to caramlize". I think I put the oven to 200 max.


Wednesday, March 10, 2010

Moroccan filled msemen a la Ganda!

I tried this Moroccan filled bread at an event at my daugther's school, every family brought food for a big joint dinner and one of the mothers was from Morocco and had made this wonderful food. I fell completely in love with it and went home and tried it out the next day or so! So here is my version of the Moroccan Mseman or  Rghaif - the filling isnt original, but I found it worked for me;)


Recipe for the dough ( which I found on the net) :

4 cups of flour
1 cup of semolina, fine
2 teaspoon salt
2 teaspoon sugar
1/4 teaspoon yeast
1 3/4 cup warm water

My own Filling:

A mix of minced lamb and viel- fry up with garlic, lemon peel, lemon juice, salt and peber and a touch of cummin and some lemon juice in the end. Leave it to cool off, add chopped parsley.


How to make them:

Mix the dry ingredients together first then mix in the wet ingredients. Mix/kneed well and leave for 30 minutes. Roll into little balls and leave them for 15 min. Then spread them out- dont use a rolling pin but use ur hands with a mix of oil and butter or just oil- with the filling as shown below.
After having made one ball into a packet- make another ball into a square and place the already folded package on the second wrap/ square with the folded sides down and fold it. So each packet has been wrapped twice!

How to bake them:

Leave the folded msemans for 15 min, then place one at the time on an olied surface and strech it, like when you made the mseman/ wraps/breads in the first place- do it carefully so you dont break them ( too much, its hard not to break them at all, for a beginner anyways) - stretch them with ur olied hands and bake them either in the owen or on a pan like I did, at moderate heat.


I cut mine out in four pieces each and ate them with fresh parlsey- really good. Not as good as Mounas..but still good! Its surposed to be crispy on the outside and chewy on the inside.

I have to say..it took it's time..and wasnt just as easy as Mouna told me ( she proberbly made it a million times) but it wasnt as hard as I thought it would be and it was really worth the effort! I read somewhere that they eat msemen with all kinds of fillings: spinach, onion,  or just eaten freshly baked with a dash of honey enjoyed with a nice cup of tea.